Join More Than 50,000+ Subscribers and get latest camera news and rumors
NEW CAMERA VIDEOS ON YOUTUBE
|
By admin, on November 30th, 2017
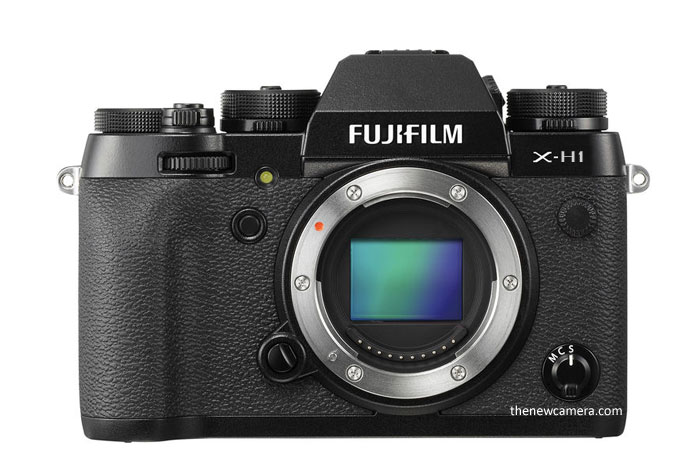 Fuji X-H1 creative image Fuji X-H1 camera name surfaced over again, this time Fuji itself leaked the X-H1 name inside the file of X-RAW STUDIO. With the help of a xml Decoder Nokoshita found that the current version of X-RAW STUDIO is compatible with upcoming Fuji X-H1 camera.
FUJIFILM X RAW STUDIO Ver.1.0
“FUJIFILM X RAW STUDIO \ FUJIFILM X RAW STUDIO.app \ Contents \ Resources \ ConversionCaps.xml”

“FUJIFILM X RAW STUDIO \ .Trashes \ 501 \ FUJIFILM X Acquire.app \ Contents \ Resources \ X-H1API.bundle \ Contents \ MacOS \ X-H1 API”
- Number of recorded pixels: 3008 × 2000 3008 × 1688 2000 × 2000 4240 × 2832 4240 × 2384 2832 × 2832 6000 × 4000 6000 × 3376 4000 × 4000
The details above clearly indicates that Fuji X-H1 camera coming for sure.
Fuji X-H1 Possible Set of Specification
Fuji X-H1 will use the same sensor as of other flagship camera, and rest of the possible specification will be
- 24.3MP APS-C X-Trans CMOS III Sensor
- Image Stabilization System
- X-Processor Pro Engine
- Internal UHD 4K Video & F-Log Gamma
- Built-In Wi-Fi Connectivity
- 1/32000 max shutter speed
So, do book mark these specification since we are the first website to publish the possible set of X-H1 specification.
No Fuji X-T2s Coming
Just after confirmation of X-H1 today Fuji Rumors claims that No XT-2s is coming and instead of XT-2s Fuji will announce X-H1 is coming.
What Next ?
Recently Fuji registered two different camera in worldwide wireless certification agencies. So, far the information goes we know that Fuji X-H1 coming for sure, we don’t know the name of the next camera yet. We do expect Fuji X-80 compact camera may arrive after the X-H1 announcement.
STAY WITH ON FACEBOOK | TWITTER | GOOGLE+ to get live news + Fuji rumors 24X7
source 1 | Source 2
By admin, on September 18th, 2014
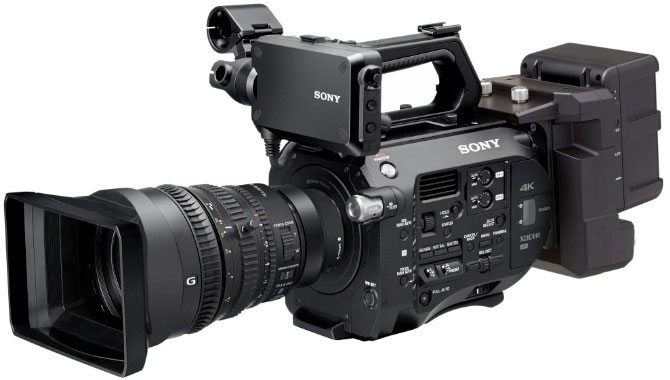
Sony has manufactured yet another 4K video camera. In and ever crowed and competitively priced market, Sony has finally made a sub $10,000 interchangeable lens, ASP-C 4Kinternally recordable camera. However, it seems like Sony may be late to the dance. There are some great features on this camera, which we will look at later in this article. However,what Sony does not get at times is the more forward thinking manufactures who are new tothe dance and are delivering democratization of cinema in droves, where Sony is still stuck, in some ways, in a twentieth-century, their hand in your proprietary-pocket paradigm. If we compare this camera and its proprietary nature to the competition, this camera fails to deliver in some areas, but excitingly delivers in others.
Sony’s first affordable 4K option was the FS700. A very good and viable option for a my riadof video applications, the FS700, however, did not shoot 4K video internally. It came with a price tag of $7,699, which was for HD only. In order to shoot 4K video, one need to spendan additional $5,350 dollars to purchase Sony’s proprietary recorder called the AXS-R5.The total set back for acquiring 4K video less lens was $13,049. In addition to that, a firmware update was needed (at a cost) and a Sony proprietary v-lock battery to run the recording unit.
There are four well-known manufacturers, which made external recorders: AJA, Atomos,Blackmagic and Convergent Design. Two of which have taken their expertise with videodata recording and parlayed that expertise and technology into sub $10,000, professional4K video cameras. The first of which is the AJA Cion. The Cion retails for $8995 and is completely vacant of proprietary connectors. This camera is light (about 6lb) and balances nicely on your shoulder. It also comes with a PL mount for professional glass applications.Two XLR inputs for audio as well as either V-mount or Anton Bower mount depending onyour battery needs. It also shoots 4K video internally to removable solid-state drives.
The Blackmagic URSA (A Detailed Look – Blackmagic URSA and CFast Cards) , on the other hand retails for a little less. The Blackmagic URSAretails for between $5,995-$6495, depending on which lens mount option you choose. ThePL mount option is $500 more than the Canon mount, which gives one a nice variety of Cinema lensesa nd DSLR to use. The URSA, like the Cion, records 4K internally, thetrade off being less money for the URSA, more money for the recording media. Instead ofusing solid-state drives, the URSA uses CFast media, which is of compact flash linage. Theadvantage being, with CF media, you can record CinemaDNG RAW, a lossy compressed format with a 4:4:4 color space. The Solid state drives for the Cion can record a 4:4:4 colorspace in ProRes. The Blackmagic URSA also comes with a full HD 1920×1080 10.1-inchmonitor, which folds in flush the camera body when stowed. The Cion needs either anexternal monitor or electronic viewfinder solution—an accessory not included with thecamera.
Let us look at the Sony FS7. There are many features on the FS7 that are well thought outand value based for the consumer. The first of which is the electronic viewfinder. Similar tothe viewfinder solution first seen on Sony HD video cameras like the PMW-EX3, the view finder solution on the FS7 uses a small OLED monitor with a diopter and eyepiece for magnification. This is a very nice option, where in some other cameras in this class, most likely a third party solution is needed via an Alphatron, Zacuto or Cineroid EVF. Another feature of note on the FS7 is the stow able smart handgrip. This handgrip, reminiscent of theAaton LTR 54 and the XTR Prod, makes it easier to not only balance the camera, but also have start stop record, assignable buttons and zoom control. On the audio side, Sony has placed two XLR inputs neatly on the right hand side of the camera, facing toward the rear ofthe camera, thus is reminiscent of the Arri Amira. TheFS7 unlike its predecessor, the FS 700will shoot 4K internally via Sony legacy CODECS, however, if you want to shoot RAW or toan external recorder, Sony’s proprietary monster rears its ugly head.
A further investigation into Sony’s new 4K camera, the FS7, the lowdown. The first item ofnote is that the FS7, comes with a proprietary lens mount. Fitted with an E-mount, the FS7will only take Sony and a few Zeiss DSLR lenses, none of which have manual iris and hardstop focus control. However, that may change. As a kit option, or individually, Sony has anew lens, which has manual focus and aperture as well as a full auto feature. Called the FE-PZ, this lens has a generous 15x zoom range from 28-135mm, with a consistent maximum aperture throughout. Kit price was not available, however, this lens is available for individual purchase. Pricing according to B&H and Adorama is $2,499, a relative bargain for a manualfull-frame lens with zoom control. Because this lens is also a full-frame design, it is also aviable option for Sony’s A7S Full-frame DSLR, which also can shoot 4K, via HDMI output toan external recorder. The drawback to this lens would be the moderate f-stop (f4) and lackof bokeh found with faster lenses.
Sony adds more proprietary devices. In addition to the above-mentioned items of glass,mounts, audio placement and multi-function handle, you need more accessories to shootcomfortably and professionally. The first item of note would be the fact that the FS7 doesnot rest comfortably and or ergonomically on one’s shoulder. The size of the camera with lens is something in between an ENG camera and a camcorder. To accessorize this kit, youneed to purchase a shoulder pad and rail solution. This is especially evident when you add Sony’s interface box, which allows you to export RAW video. The interface also has a battery solution, however, this is proprietary as well, taking a Sony v-lock. There are noother battery options like the ones available on the Blackmagic URSA and AJA Cion.Additionally, if you want to output RAW or ProRes files, youwould need to purchase the interfacebox accessory from Sony for around $2,000. This would allow you to connect Sony’s own AXS–R5 orany of the other external recorders from AJA, Atomos, or Convergent Design. The FS7 records internally to Sony’s XQD recording media, which has transfer rates (read/write) upto 180MB/s. These cards are reasonably priced with a 64gb card retailing for $298.95.
In a confluence of two former divergent paths, Sony’s FS7 has made up a great deal ofground. Although not a perfect camera, it does make substantial inroads towards the Democratization of Cinema. For $8,000 you get a 4K camera, which can record 4Kinternally, a first for Sony at this price point. However, the camera is not without its flaws.Other manufacturers such as AJA and Blackmagic have very completive offerings—givingyou more professional features such as internal recording of 4:4:4 color space. Moreover,the lensing options for theses new comers covers a wider range of glass. Sony with its blinders on has focused its competitive gaze not on the new comers, but more on Canonand their C500, which retails for $19,999. With the FS7’s ability to record higher bit rates with and more professionalCODEC options, Canon may be the real laggard in this race. Completion is good. It causeslegacy companies to rethink their business model and manufacturing paradigm and itcreates innovation from new companies willing to think beyond the status quo. As RED had done a decade ago, giving us the first 4K production camera, one of the legacy giants,Sony, has now awoken with a substantial new offering their own, the FS7.
About the Author: Thomas Cznarty is a lecturer at the State University of New York at New Paltz. Currently, he teaches in the Communication and Media department. He writes poetry, short fiction and screenplays. Thomas Cznarty is also a filmmaker and media producer with a strong background in film and television production.
By admin, on November 21st, 2013
 © armina – Fotolia.com Shooting Your First Wedding
As a photographer, one of the most lucrative forms of business comes in the shape of wedding photography. However, it is also one of the most nerve shredding jobs out there. Only you have been behind the camera at a wedding will you truly understand why photographers seem to charge more for weddings! The majority of photographers will do their first wedding shoot as an amateur for a friend or relative, which can actually be more pressure than shooting a stranger’s wedding. Let’s look at a few tips to see you through your first wedding shoot.
 © Sergey Ryzhov – Fotolia.com Get Some Experience With A Professional
One of the best pieces of advice is to approach an experienced wedding photographer and as if they will take you along as their assistant on one of their wedding shoots. You may even negotiate taking a few candid shots on your own provided that you are not in the way of official shots. Nothing can match the experience of seeing a professional at work. You will pick up tips regarding everything from what sort of shots to look for through to how to manage guests. They may even offer tips about the best equipment for wedding photography.
Offer Free Additional Photographs
Another good tip is to find a couple among your social circle or family who is getting married and already have a photographer booked. You can offer to take additional photographs alongside their photographer free of charge. Again you must be sure not to get in the way of the official photographer. This gives you experience without the pressure and if they like the pictures, they may end up purchasing prints. You might wish to do this several times to build your confidence. Since you are offering your services free of charge you have no liability if the photographs come out wrong.
Going It Alone
Once you are ready to go it alone and have secured your first wedding booking it is a great idea to enrol on a short course in wedding photography the week before the big day. This will get you up to speed on techniques, poses and lighting in order to make the most of the shoot. It is also a good idea to meet with your bride and groom in order to discuss their personal expectations. There is no point in doing traditional posed portraits if the couple would prefer candid shots. It is helpful to know about those traditional poses though, just to be safe. The parents will no doubt expect a few!
Be Prepared
The stressful part of wedding photography is that it is a one shot sort of deal! There is no scheduling a re-shoot and so you must be prepared for any eventuality. Go ad visit the venues before hand so you have an idea of where you will be shooting. Similarly you need to know how to get there and leave plenty of time to do so. If the shoot is to be outdoors look for an alternative in case of poor weather.
Never be caught out by equipment failure. That means bring back up cameras and back ups for your back ups. You should pack plenty of battery packs, lenses and other items you may need. You also need to be aware that you should not use a flash during the ceremony – no bride wants to be dazzled, so check out the lighting. Similarly, if you are going to move around wear soft shoes and do so very quietly.
When shooting a wedding, it ll comes down to practice and building your confidence so you need to put yourself out there even if you do the first 10 weddings free of charge. There is no substitute for just getting stuck in! Keep these tips in mind and you will be as prepared as possible to tackle your first bridal shoot.
David Lye is a co-founder of http://www.photographers.com.au. He is passionate about photography and particularly enjoys wedding shoots.
By admin, on October 28th, 2013
Mobile photography is gaining popularity and acceptance among professionals and novices alike. They have fallen in love with phonenography and mastered the art of using their mobile devices to record memories and their surroundings in rich detail. Have you ever wondered how they did it? Bring out your mobile device and try the tips that we have below and take your skills to another level.

Using Your Mobile Phone to Produce Captivating Photographs
Good photography isn’t about the gear. You can take amazing shots using a camera phone if you only know how to use it to your advantage. Knowing its strengths and weaknesses is almost winning half the battle. So far, Nokia Lumia 928, offers a great imagery output. It has an 8MP sensor with an aperture that opens to f/2.0. It has the latest Pureview Technology and a Xenon flash. These features greatly help in producing crisp images even under low-lit conditions.
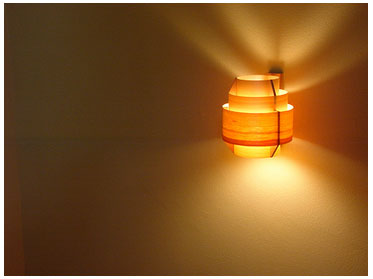 Photo from Midorisyu of Flickr 1. Look for the best source of light. Try to take your subjects outdoors during the “Golden Hours”. Correct lighting is helpful in getting clear and crisp shots. Indoor lights can also be used. Don’t forget to use the correct white balance setting so the color of your subjects would appear more natural. It’s okay to use the flash on your device, just diffuse it a little. Cameras have available flash diffusers; you need to be a bit more creative to lessen the glare when using a phone. Use a piece of tissue paper to hold over it before pressing the shutter.
2. Learn how to apply the rule of thirds on your photographs. Don’t put your subject in the middle of the frame every time. You can always experiment using different angles to give a more interesting feel to your shots. The best thing about digital media is that you don’t have to worry about the number of shots you can take (as long as you don’t save them all on your memory).
3. Digital zooms are disastrous to use. If you don’t want to end with an image with a tiny far-off subject, you adjust to your subject. Editing is an option, but cropping an image closely distorts it. The result might be a more disappointing because of an unusable final image.
4. Keep your hands steady. Shaky hands result in blurry and often times unrecognizable images. There are several mobile tripods available in the market. A cheaper alternative would be to use a solid object and lean on it while taking the shot. It will help you keep your hands steady. If you think you made a mistake, don’t be too quick to discard them. Wait until you get to a computer before making a decision. You might be surprised to see that the mistakes can be used to make abstract art when you start editing them.
5. Don’t sacrifice memory space for a low-resolution image. High-resolution photographs can admittedly take up space on your memory card, just think that the higher the resolution, the clearer the photo becomes.
6. Like other digital cameras, you need to keep your lens clean. Most camera phones do not come with a lens cap, which increases the risk of damages. Check the lens often and use a soft clean cloth to clean it.
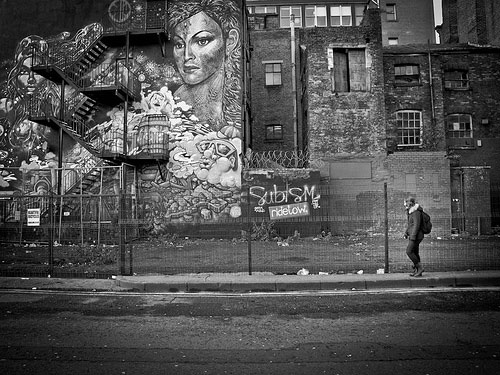 Photo from Ian Caroll of Flickr 7. Lastly, keep in mind that you need to respect others when taking a photograph. If you are attending an event, like a wedding, don’t get in the way of the professionals so you can take a memento shot to post on your Facebook page. Let the professionals do their work first and then ask for permission to take your own shot. Do the same thing when out in the street. Ask permission before taking photos of strangers.
Do you have any more tips to add to our list? We want to see your lovely captures. Send us a Tweet. In addition, you can always find interesting photos, tips and discussions on our Google+ page. Join our growing community. You can always leave a comment below to start a lively discussion.
About the author
Nadia Hyeong likes to talk anything that involves technology, gadgets and games. During her spare time, you will see her listening to music or playing games. You can always find her on Google+ (gplus.to/NadiaHyeong) or Twitter (@NadiaHyeong).
By admin, on September 6th, 2013

I don’t like to admit this to many other photographers, but I have to confess: I rarely use my DSLR anymore. Even when I’m shooting a photograph that errs more on the side of “artsy” than “snapshot,” I’ve started to default to the shutter on my iPhone. I know that this makes some photographers, well, shutter, especially my friends who are still committed to physical film and their insistence that the materiality is the heart of photography.
I didn’t always disagree. In college, I developed an obsession with artist CaroleeSchneemann, who reveled in the physical nature of the film by painting directly on the stock. In doing this, not only did Schneemann add a textural element to her films, but in a more general sense, she took the limitations of film—and motion pictures—and created art out of it.
Orson Welles once stated that “[t]he enemy of art is the absence of limitations.” The age of digital media and Adobe Photoshop seemed to introduce limitless possibilities to the world of photography. I certainly bought into it—I loved that I could make a shot appear to be in focus using filters on Photoshop. I loved that I could put my digital camera into “burst” mode so that I didn’t have to worry about the cost of each shot. I hardly missed working with film, though if you would have asked me as an undergrad, I would have talked extensively about loving the tactile experience.
Nevertheless, my photos became boring. My only limitation was my lack of interest in clicking through the million photos I took of my town’s 4th of July Parade. I had a big memory card and an even bigger backlog of photos to edit. My phone can only hold so many photos, and while I can easily load them on my computer, I can’t do that while sitting cross-legged on a church lawn with an America flag in my other hand. My iPhone reintroduced limitations to my artistic practice, and I think my photos are better for it.
iPhoneography is a growing niche in the photography world. Technically, iPhoneography involves capturing and processing photos on an Apple iPhone as opposed to another digital device, and purists will claim that you ought to edit your photos on your iOS device as well. While apps make it possible to edit photos as one would on PC or Mac-based editing software, the size of the screen itself has proven to be a worthwhile limitation for some artists.
As for the everyday photographer, the popular Instagram app and community has forced iPhone photographers to consider composition in a whole new way. You will not be able to fit your entire image on Instagram—it must conform to a 612×612 pixel square, not the standard 4:3 aspect ratio that so many of us have learned to consider as we shoot. This limitation has inspired photographer/developers to develop apps that either hack Instagram or help photographers see the square on their screen while shooting as opposed to having to consider the composition in their heads.
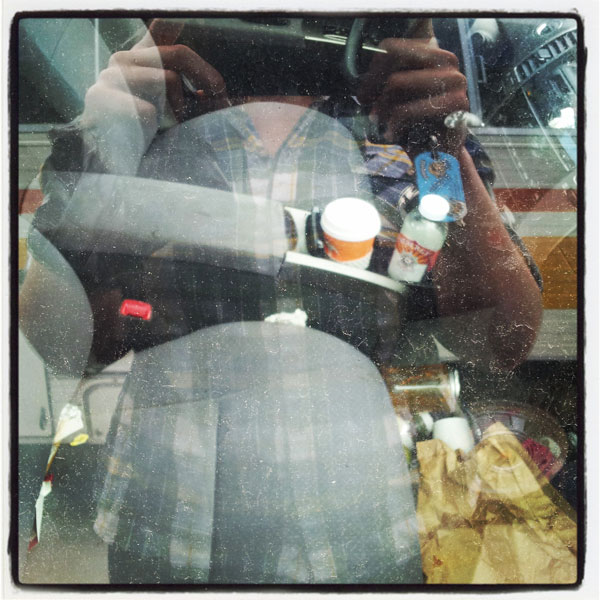
And what about photo quality? My iPhone takes great quality photos, but they’re never as sharp or nuanced as what I can capture with my DSLR. I know this. As my interest in Schneemann’s films may reveal, I’m a sucker for art that reveals something about the medium itself. The iPhone is easily the device of our time, and when I take photos within the grasp of its limitations—or that hacks its limitations like the physical manipulation of film—I’m not only capturing a visually-striking moment, but I’m also able to say something about photography in the digital age. If I wanted to, I could make a comment about the democratization of art photography. The ability to both make compelling images and contribute to the larger photographic discourse makes me more of an artist than simply taking pleasant photographs.

photo credit: Alícia
But the limitations presented by shooting with your iPhone will spark your creativity—force you to make connections and deal with the physical realities of the technology at hand—even if your goal is to make your friend who lives across the covet your dinner via Instagram every night. Perhaps the ubiquity of iPhoneography hasn’t diluted the appreciation of interesting, well-crafted images, but has instead created the ideal situation for more photographers to identify and engage in well-crafted photography.
Author – Amy Cobb feels most at home behind a keyboard or a snapping shutter. She’s a Jill-of-All-Trades media refugee turned blogger who, since jumping ship from the Fourth Estate, blogs on all things media and media-education-related. Most recently she’s worked on cataloging the best photography colleges. When not writing, Amy is thwarted by square foot gardening or playing with her Cavalier King Charles Spaniel, Snarls Barkley.
By admin, on October 12th, 2012
Even if you only have the most rudimentary knowledge of photography and are content with your compact digital camera, there’s a strong chance that you’ve heard of DSLR cameras. For more than a decade they have generally been considered to be at the top of the pile in terms of camera technology. However, due to a recent innovation by technology giants, Sony, there’s a brand new acronym in town looking to claim the title of ‘camera of choice’ for itself – the SLT.
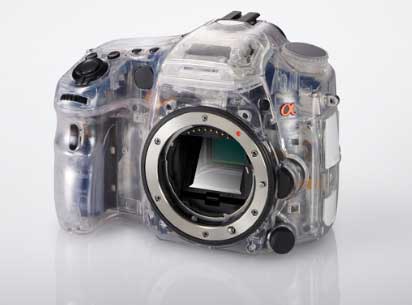
What’s the difference? Where’s the innovation? Well, part of the story is in the name: DSLR stands for digital single lens reflex; SLT for single lens translucent. Forgetting the omission of ‘digital’, the key difference lies in the use of the term ‘translucent’, rather than ‘reflex’, which in both cases refers to a mirror used inside the camera.
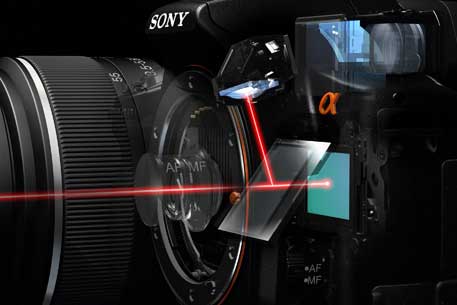
In the case of the DSLR, the mirror reflects light up into the viewfinder and then, once the shutter button is pressed, it lifts out of the way to allow the photograph to be taken, hence the ‘reflex’.
In the case of the SLT, however, the mirror is translucent, so it allows light to travel directly through it for the picture, with only a small amount being reflected for use in the camera’s autofocus system, thus eliminating the need for internal movement of the mirror.
This means three things primarily: firstly, less of a time delay between pressing of the shutter button and the actual photo being taken, so photos are practically instant and can be taken in more rapid succession. Secondly, the lack of movement inside the camera reduces shake and blur, meaning sharper images.
However, the third difference associated with the translucent mirror is that invariably a small quantity of light is absorbed by the mirror, which ultimately means that less light finds its way through to the sensor – so certain shots, in low light for example, may lack a degree of clarity and definition.
The technology behind SLT cameras is certainly promising and impressive, although still in its early days, so it’s perhaps no surprise that many professional photographers continue to use traditional DSLRs. The jury is still out in terms of which camera type is superior, but can we certainly think both can co-exist?
By admin, on October 9th, 2012
It is not at all unusual for students and professionals working in photography to know people in the performing arts. The relationship can by symbiotic – they might provide the photographer access to performances, performers and all that might go with those things. And, they might need you, the person with the camera and skills – for head shots (actors) or a comp card (models). As most are not yet rich and famous, they may want you to do it on a shoestring budget at that.
This is not a bad proposition for an early-career photographer. Particularly for students, it can be the beginning of their own work in a professional context. Imagine what it might mean for those attending photography schools in NYC (the New York Film Academy among many others), where literally thousands of young people are vying for fashion shoots, roles in TV and film, and on Broadway (or, more likely, off-Broadway). They need some pictures. And who else to supply them but someone approximately their age who will not charge an arm and a leg for it?
If you have been approached about creating portraiture for an actor or model, a few tips might help make it a successful project for both of you. They are:
Establish expectations: This means that you have to create rapport with your subject-client. Ask about their previous experience in front of a camera, including if it was bad or good for them. Have the individual send some pictures of themselves that they liked in advance of the shoot, as well as images they didn’t like. Also, ask them to provide an example of shots of other people who achieved what they hope to get out of a shoot.
 A highly stylized shot requires extra effort in lighting and sets. Your model should know that generally costs more. Outline the parameters: This is where you find out exactly what they want, and how much they are willing to pay for it. You need to know how many final, usable shots they will need. Do they want them retouched? Retouching will typically be more extensive with models, as actors get into trouble if they over-beautify themselves. As is standard practice for professional photographers, you will basically sell them license to use your photographs but you will not give them your RAW files. Much of this would be outlined in a contract template that you can get from the American Society of Media Photographers (ASMP), which provides online tutorials and forms on writing contracts. Keep in mind that all your work should remain your intellectual property, and the contract helps explain that to the client.
 For actors, character shots help illustrate personality, expression and range. Find their most natural expressions: First and foremost, you need to make the subject as relaxed and comfortable as possible. This is a key skill – and perhaps the toughest task – for any commercial photographer working with human subjects. Here’s why: The human face is not capable of producing an authentic smile unless it’s truly felt. The involuntary muscles around the eyes simply do not match a mouth smile unless the person is truly laughing or chuckling or otherwise genuinely happy in the moment. One way to get the client to let go of natural tension in the face is to ask them to do goofy faces and to move the jaw and shoulders around. (Almost all people hold most of their tension in their jaw and shoulders.) When you start shooting, do not hold lighting or reflectors too close to the model/actor; they need to feel they have room to move in space.
 An animated picture has life, where even a still can suggest movement. In general, you should create close-up and full body shots of models, as well as hand shots if they expect to find specialized work in that area. Actors should tell you if they audition for serious, comedic, romantic or action roles – the kinds of photographs you create need to be consistent with those goals.
Each of these steps provides valuable and productive experience for both the photographer and the subject. Of course, with practice, you will get better at it over time – all the more reason to start doing this as soon as possible.
Authors Bio:
Brian Dilg is Chair of Photography at the Photography School at the New York Film Academy. In addition to 20 years of professional teaching experience around the world, his work has been published in The New York Times, Time Out, Village Voice and covers of books published by Simon and Schuster, Random House and Hyperion. He has also worked in post-production for major fashion houses, consumer products manufacturers and media organizations. He also has won awards as a filmmaker and worked as a director, cinematographer and editor of narrative, documentary, music video and commercial films.
|
KEEP THIS BLOG ALIVE - Support New Camera Buy Canon Lenses, Buy Music CD or Digital Camera at amazon it helps this site, and you do not pay anything extra, it is just a way to help support this site.

|


