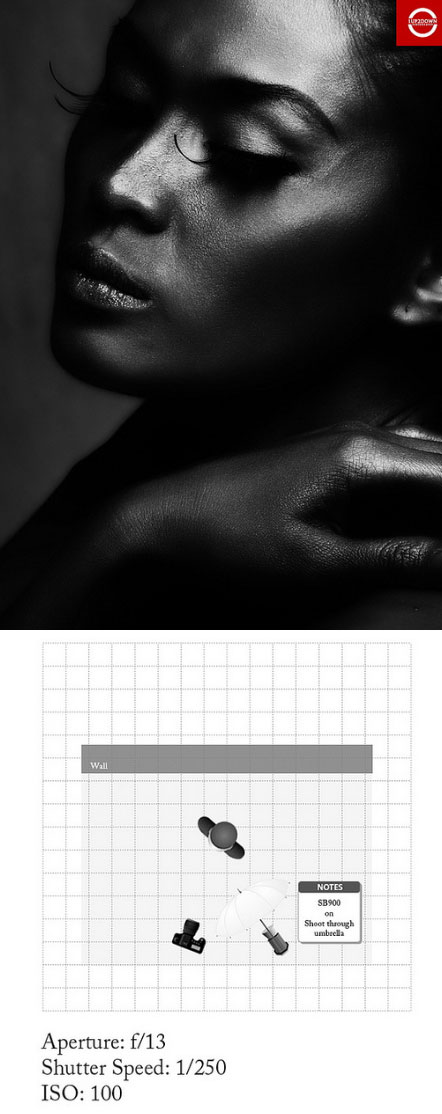
What is a portrait?
From the very first pictured pictures on wet plates by nineteenth – century photography pioneers to the latest images recorded as digital files on the computer, people have always been the most popular subject for photography. For amateurs, the most common reason for taking out their cameras is to record for posterity, both the individuals who are important to them, and the special moments of their life. In the world of professional photography, portraits represent a significant proportion of commissioned work.
But what do we mean by a “portrait?” One English-language dictionary defines it as a “likeness of an individual, specially of the face.” But while that definition is certainly one with which many would agree, it doesn’t really do justice to the multitude of ways in which people can be portrayed in a picture.
Lighting Matters
If you don’t have much time then sophisticated lighting setups are obviously out. Setting up a single umbrella or a softbox is relatively quick procedure. Once you’ve use it a couple of times and if you maintain the same distance, you may not even need to take a meter reading, since the camera settings will be in mind already. Keeping it simple has another advantage. The result looks clean and contemporary. Style change and picture date. You need only a glance at a picture for hair light, for instance, to see immediately that it’s old-fashioned.
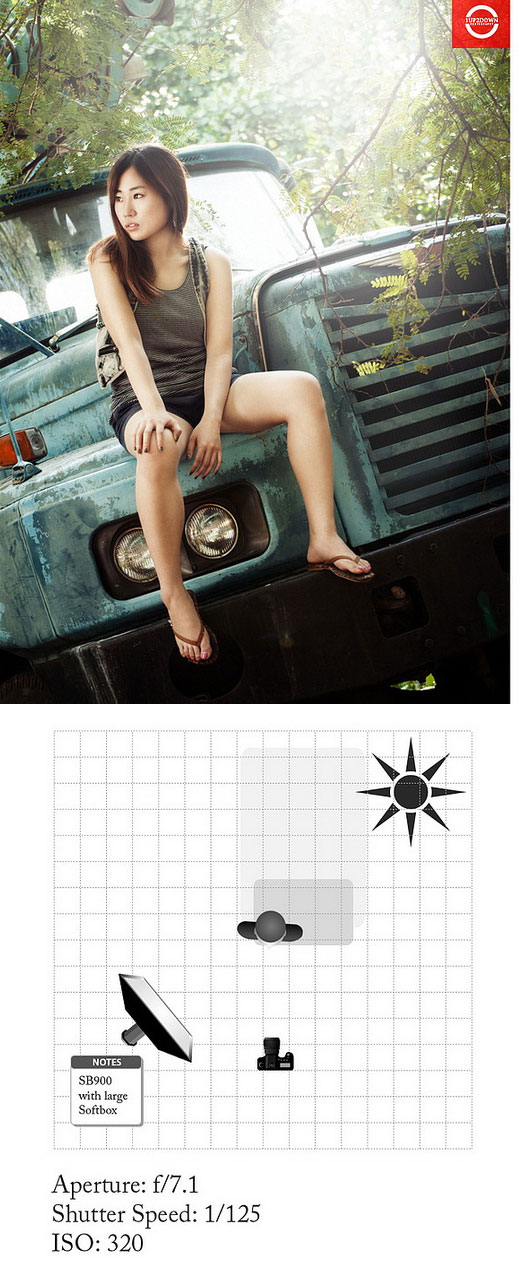
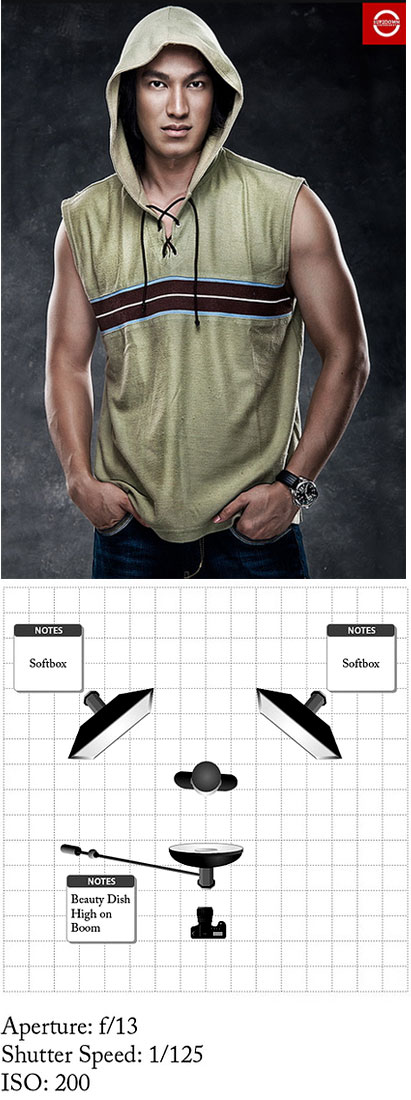
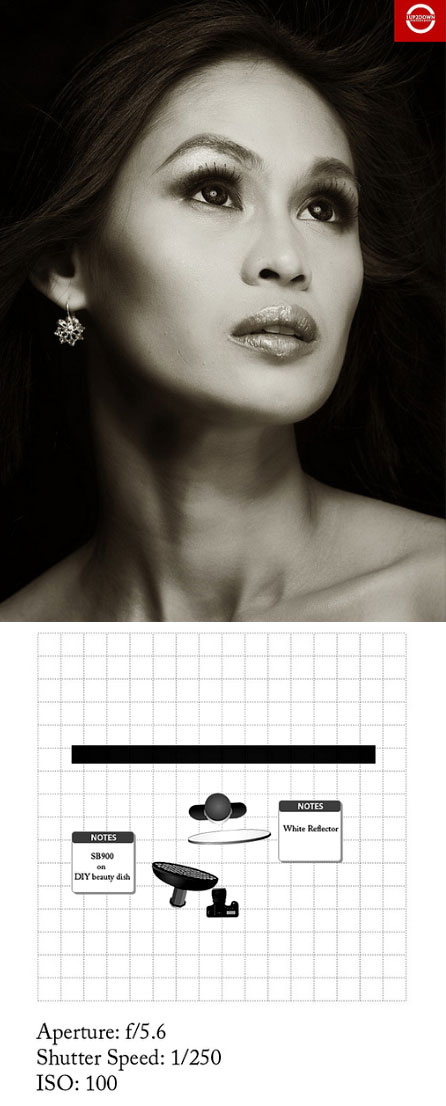
Another reason for simple approach is that one light is also surprisingly versatile, depending on where you place it in relation to the subject, and whether or not you add a reflector to soften the shadow. With two lights you have more control over ratios, but also run the risk of over lighting the subject. Tried and tested setups include one above the camera and one below for “beauty lighting” and either side of the camera at 45 degrees for even coverage. Naturally there will be times when you want to use more than 2 lights, but think carefully about what each light is contributing to the finished picture. If it adds nothing, don’t use it.
Sometimes, though, you don’t need to add any additional lighting at all because the ambient illumination is perfect. Both indoor and outdoor daylight have many moods, and with a bit of help from a poly board, they can give you a quality that’s hard to reproduce artificially.
Making Light Works
understanding, measuring, and using light to create exciting and memorable images
Light is the single most important element in any picture. You try taking a picture without any! And the way you use light that often makes the difference between success and failure. You can have the most attractive or interesting model in the world, get your focus right and exposure perfectly, but if the lighting’s not good you can forget it. However, it’s astonishing how few photographers pay any real attention to light. Even professionals can be so eager to press the shutter release and get the shot in the bag, they don’t really think about how to make the light work for them. Getting to know light, and being able to use it creatively, are essential skills for any photographer. One of the best ways of developing and deepening that understanding is to monitor the many moods of daylight. You might find yourself noticing how beautiful the light is on the shady side of a building , or coming in through a small window, or dappled by a foliage of a tree. The most amazing thing about light is its sheer diversity; sometimes harsh, sometimes soft; sometimes neutral, sometimes pinkish or blue.
More doesn’t mean better
Taking picture is easy when there’s lots of light. You’re free to choose whatever combination of shutter speed and aperture you like without worry about camera shake or subject movement.
But don’t be confuse quantity with quality. He blinding you’ll find outdoor at noon on a sunny day or bursting out of a bare studio head maybe intense, but it’s far from ideal for most kind of photography. More evocative results are generally achieved when light is modified in some ways, with overall levels often much lower.
Controlling the contrast
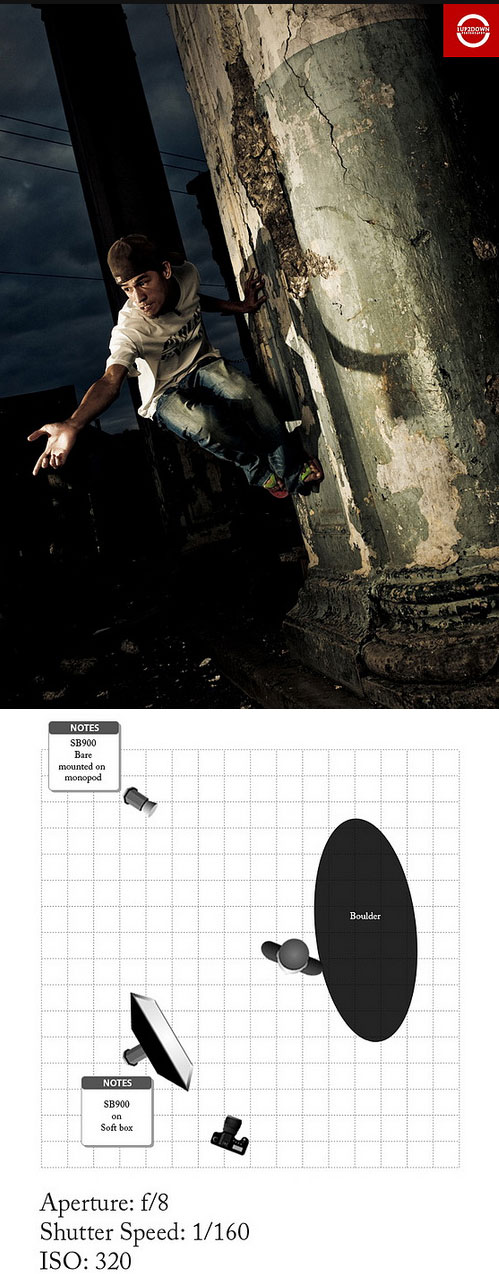
For some situations and subjects you will want light that is hard and contrasty, with strong, distinct shadows and crisp, sharp highlights. Outdoor when it’s sunny, the shadows are darker and shorter around noon, and softer and longer when it’s earlier and later in the day. Contrasty lighting can result in strong, vivid images. However, the long tonal range you get in such conditions can be difficult to capture either digitally or in film. Care must be taken when shooting in such light so that no important detail is lost in light or dark areas.
The kind of strong contrast treatment is not always appropriate or suitable, however, and for many subjects and situations a light with a more limited tonal range that gives softer result may work better. Where you want to show the maximum amount of detail, or create a mood of lightness and airiness, with minimum of shadows, the soft lighting of an overcast day or a large softbox is unbeatable. The degree of contrast also depends on the direction from which the light is coming in every picture you are using light to reveal something about the subject (texture, forms, shapes, weight, color, or even translucency). So look carefully at what you are going to photograph, and consider what you want to convey about the subject, then start to organize the illumination accordingly.
The Article / Images belongs to Sid Visit his website http://www.1up2downphoto.com/, Visit his flickr gallery


